Hospital Price Index (HPI)
Note: This appendix applies only to HPI Admin users.
Hospital Price Index (HPI) is a tool that can assist with hospital price transparency compliance by analyzing your CDM, creating service packages and determining your shoppable items, and posting the required information to the Chargemaster, All Service Items, and Shoppable Services tabs of your hospital's HPI website.
To add items, in VitalCDM you will have access to an Admin file that populates the All Service Items and Shoppable Items tabs, and a CDM file that populates the Chargemaster tab for your HPI site.
To add items for the All Service Items or Shoppable Items tabs, do the following:
- Open your Administrator CDM file.
- Click the View Item Editing Tab button in the upper right corner.

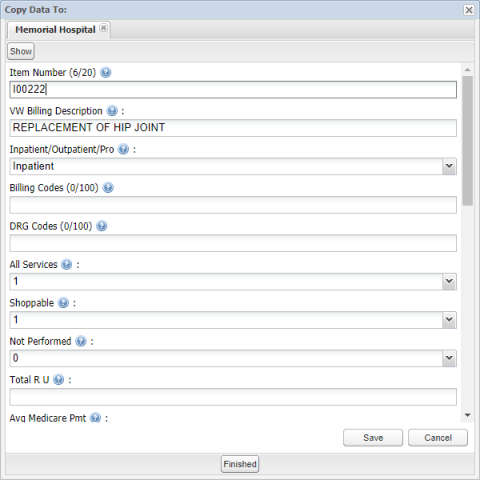
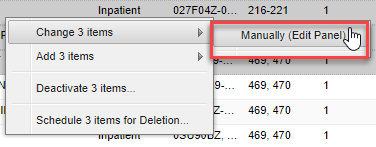
Note: If there is an existing item similar to the one you are creating, you can right-click the existing item and select Add item > Manually (Edit Panel). This will copy the existing item's information into a new item, which you can then edit and save.
- If an item is selected in the table, its information appears in the editing tab. Click New Item to enter information in the blank item. If no item is selected, a blank new item displays in the editing tab.
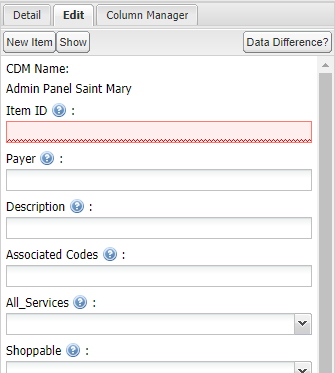
- Enter information in the fields as necessary. For the All_Services and Shoppable fields, select 1 to include the item or 0 if the item should not be included.
- Set an item as Not Performed in order to override the item's price when it is published to the HPI site. If you set the Not Performed field to 1 and the item is included in your Shoppable Items tab, then N/A will display as the price for that item.
- Click Save.
In VitalCDM, you will have access to an Admin file that populates the All Service Items and Shoppable Items tabs, and a CDM file that populates the Chargemaster tab for your HPI site.
To update items for the All Service Items or Shoppable Items tabs, do the following:
- Open your Administrator CDM file.
- Right-click the items you want to edit and select Change (x) Items > Manually (Edit Panel).
- Edit the fields as necessary. For the All Service Items and Shoppable fields, select 1 to include the item or 0 if the item should not be included.
Note: The Shoppable Items tab can display primary items and the ancillary items associated with each. Reach out to your Client Success representative for more information about implementing this feature.
- Set an item as Not Performed in order to override the item's price when it is published to the HPI site. If you set the Not Performed field to 1 and the item is included in your Shoppable Items tab, then N/A will display as the price for that item.
- Click Save.
Note: After you click one of the Publish buttons, your data will start publishing at the top of the next hour. The process runs every hour, seven days a week, between 4:00 am and 8:00 pm Pacific time, and it takes approximately 15 minutes.
To push items to the All Service Items or Shoppable Items tabs, do the following:
- Open your Administrator CDM file.
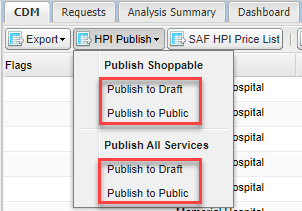
- Click HPI Publish.
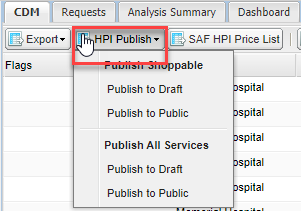
- Click one of the following:
- Under Publish Shoppable:
- Publish to Draft. Publishes your Shoppable tab items to the draft website so that you can preview it. You will need to log in to this site with your Vitalware credentials; this site is not viewable by the public. The draft URL is similar to your public URL, except "hpi2" is replaced by "hpidraft."
- Publish to Public. Publishes your Shoppable tab items to the public website, where anyone with the URL can view them.
- Under Publish All Services:
- Publish to Draft. Publishes your Service tab items to the draft website so that you can preview it. You will need to log in to this site with your Vitalware credentials; this site is not viewable by the public.
- Publish to Public. Publishes your Service tab items to the public website, where anyone with the URL can view them.
- You will receive a message that your request has been received. Click OK.
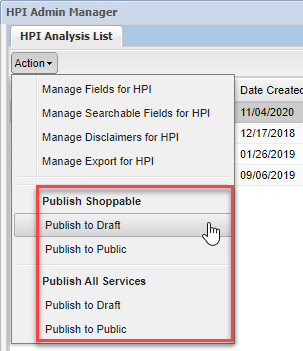
Note: You can also publish your Shoppable items and your All Services items from the HPI Admin Manager.
To view items that are included on Medicare's SAF price list, do the following:
- Open your Administrator CDM file.
- Click SAF HPI Price List.

To change the text that appears in the disclaimers on your HPI site, do the following:
- Open your Administrator CDM file.
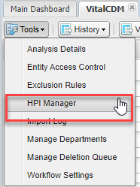
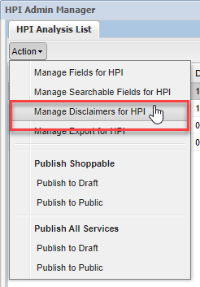
- Select Tools > HPI Manager.
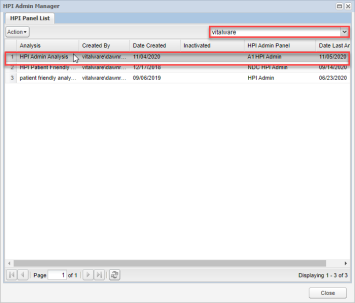
- Select your Entity and your HPI admin file.
- Select Actions > Manage Disclaimers for HPI.
- Enter your separate disclaimers for the three tabs: HPI Chargemaster Disclaimer, Shoppable Items Disclaimer, and All Service Items Disclaimer. You can format text, apply list styles, and add links using the toolbar.
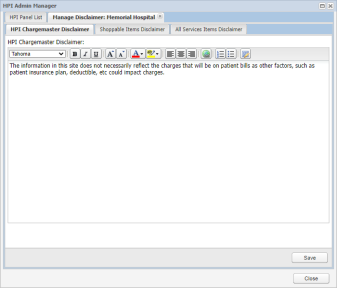
- Click Save.
You can allow visitors to your HPI site to download the search results on your All Service Items tab. To set this up, do the following:
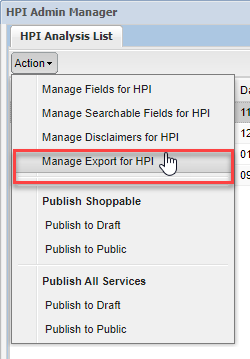
- Go to Tools > HPI Admin Manager, select your HPI admin file, and select Action > Manage Export for HPI.
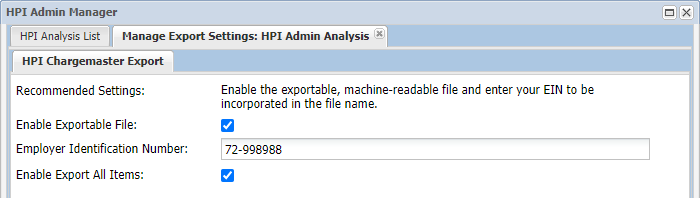
- You have two options for export:
- Enable Exportable File. Allows site visitors to export the results after searching the All Service Items tab.
- Enable Export All Items. Allows site visitors to export all items included in your All Service Items tab, even if they haven’t searched. This export will include both primary and ancillary items.
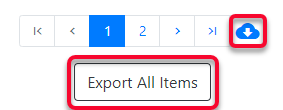
Note: The Enable Export All Items option allows site visitors to export all items on your All Service Items tab. The Enable Exportable File option allows site visitors to export only their search results on the All Service Items tab. Previously, to export all items a site visitor had to enter two asterisks (**) as a search term to display all items, and then click the blue cloud icon to export results. This new option gives site visitors a more straightforward Export All Items button to export all items without searching.
- When both export options are enabled, an Export All Items button displays on the All Service Items tab. After a site visitor performs a search, the Export Results blue cloud button displays at the bottom of the results table for exporting results. Clicking either button downloads a .json file with the results.
- If you are viewing the non-public draft URL, you also have an option to export a CSV of your draft data.

Note: The CSV export is only for the draft URL.
You can control which fields are available on your HPI site. To manage fields, do the following:
- Click Tools > HPI Manager.
- Select the HPI admin file and then select Action > Manage Fields for HPI.
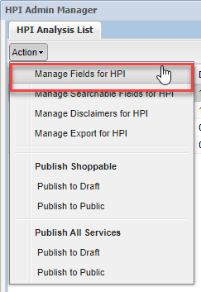
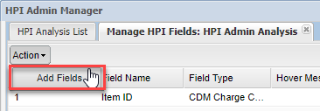
- The Manage Fields tab displays. To add fields, select Action > Add Fields.
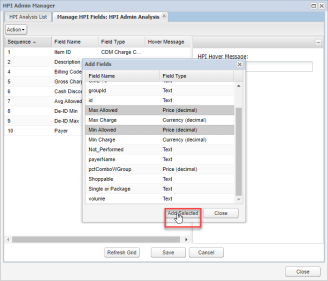
- On the Add Fields window, select the fields you want to add, and then click Add Selected.
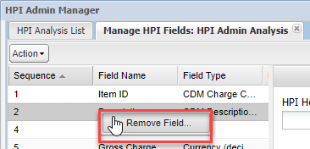
- To remove a field, right-click the field and select Remove Field.... Then click OK on the confirmation message.
- To change the text that will display when visitors to your HPI site hover over each field, select the field and then enter text in the HPI Hover Message field.
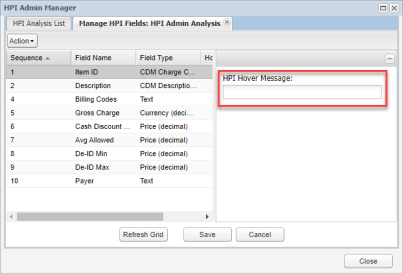
- Click Save to save your changes.
Managing the URL Update Date
You can adjust the Last Updated date that displays on each tab of your HPI site.
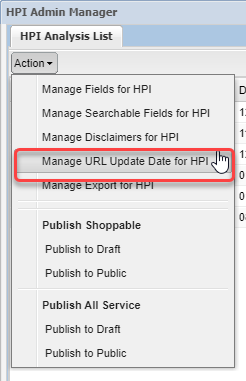
- Click Tools > HPI Manager.
- Select the HPI admin file and then select Action > Manage URL Update Date for HPI.
- On the Manage Update Dates tab, set the date you want to display on each of your HPI site tabs.

- Click Save.
You can add searchable fields to your HPI site to include information that is not viewable by people visiting your HPI site.
Example: Someone visiting your site is looking for cisplatin, a common chemotherapy drug. Your HPI site has chemotherapy drug as a generic term, but not cisplatin specifically. You can add a secondary description field to your HPI searchable field for specific examples, and on your chemotherapy drug item add cisplatin (as well as others as necessary) in this field. The secondary description field, containing Cisplatin, will not appear on your HPI site unless you have included it in your managed fields to display, but a search for cisplatin will return your chemotherapy drug item.
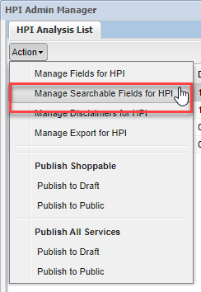
- Click Tools > HPI Manager.
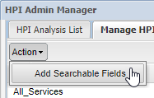
- Select the HPI admin file and then click Action > Manage Searchable Fields for HPI.
- The Managing Filters tab displays. To add filters, select Action > Add Searchable Fields.
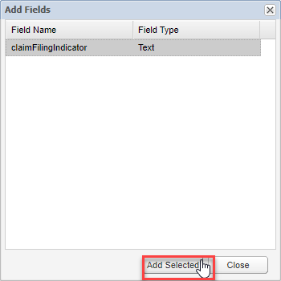
- On the Add Fields window, select the fields you want to add, and then click Add Selected.
- To remove a field, right-click the field and select Remove Filter Field.... Then click OK on the confirmation message.
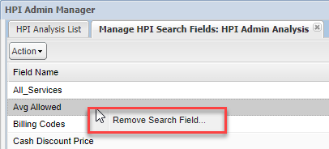
- Click Save Filters to save your changes.
 Adding Items