Did You Know?
Product Release Schedule
Product enhancements, new features, and bug fixes are released to the live software environment every other Thursday afternoon.
Note: Due to the upcoming holidays, some releases for the next three months will be adjusted. Dates in bold font below do not follow the regular two-week release schedule.
The next two Release Dates are:
- November 30, 2023 (no release on November 23, 2023)
- December 14, 2024
As a VitalCDM end-user, you have the capability to add analysis-type fields without limiting line items by a specific report. Additionally, you can create a saved view with any fields you may have added.
Adding Fields
When in VitalCDM, select the appropriate entity, the appropriate CDM, and an analysis.
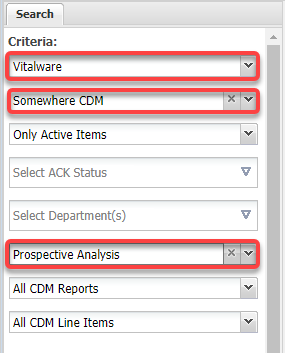
Click Search to return the specific analysis data.
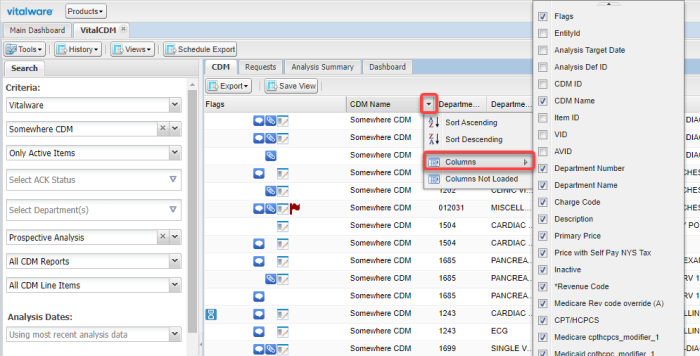
Hover over a column header within the grid on the right-hand side of the screen and click the Black down arrow. You will then hover over Columns. A list of columns will pop up and you have the option to remove or add any columns by checking the box next to the column name. The columns selected will be brought in at the end of grid.
Creating a Saved View
You have the capability to save custom views that include columns added or removed from the grid as well as any sorting or filtering criteria applied.
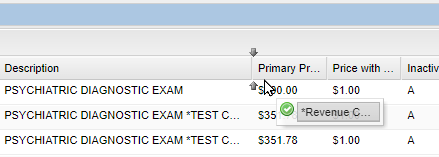
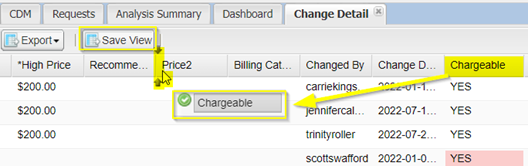
To adjust the column order, select the column header and then drag and drop the column into your preferred position. The green arrow indicates a successful drop location.
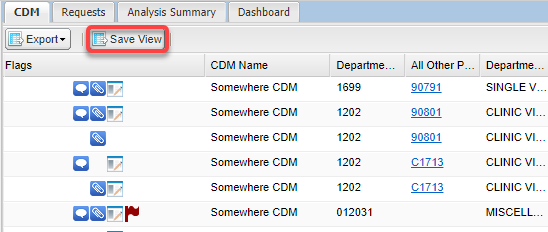
Now that you have your column headers in the order of your liking, click Save View in the upper left-hand corner of the grid.
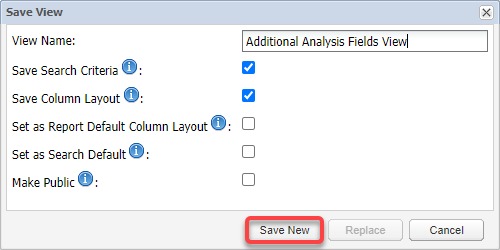
A window will pop up where you will enter a name for this specific view, which is required. You can select from the following options:
- Save Search Criteria: Selections in the left panel
- Save Column Layout: Column order and sort criteria
- Set as Report Default Column Layout: If a report was being used, checking this box will make the grid the default when selecting that report
- Set as Search Default: Will default the grid as your view when entering VitalCDM
- Make Public: Limited to Admin users. Makes the view accessible to all CDM users at the organization.
Next, select Save New.
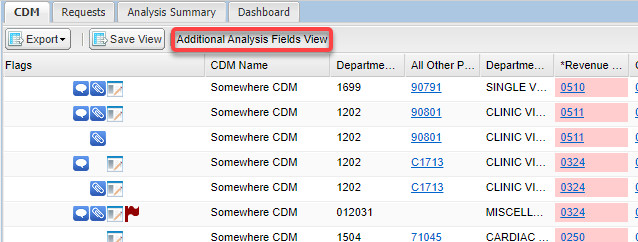
Once you save your view, the name will appear next to the Save View button to let you know what view you are seeing in the grid with the specific column layout.
For assistance to add Analysis Fields without limiting line items by selecting a specific report, or to create a saved view, please contact your Product Implementation Consultant or Client Success Manager directly, or email vw-cs@healthcatlayst.com.
Within VitalCDM, you can view either a Summary History Report or a Detailed History Report. The Summary History Report displays the current version of the records in comparison to the last known version whereas the Detailed History Report shows each version of the record within the specified time frame.
Accessing the History Reports
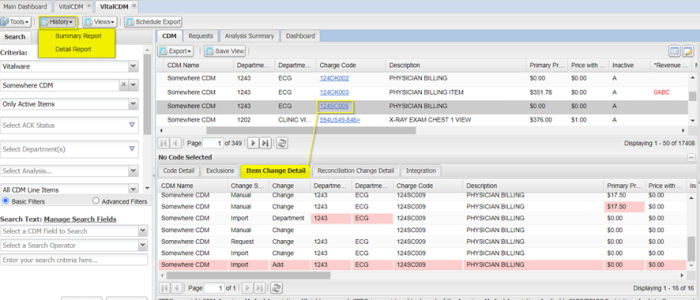
When in VitalCDM, select the History drop-down in the top left corner and open either the Summary Report or the Detail Report. The Detail History Report for a record is also available in the Item Change Detail tab of the lower panel.
Navigating the History Reports
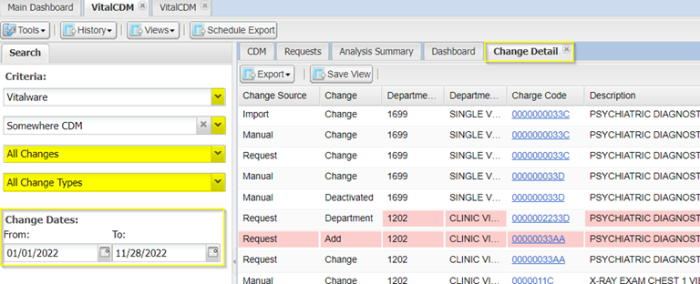
After selecting the preferred Entity/CDM you can filter from All Changes to a particular change method (Request, Manual, or Import) or from All Change Types to either Adds, Changes, or Deactivations. Additionally, you can filter to a specified time frame for auditing and reporting purposes.
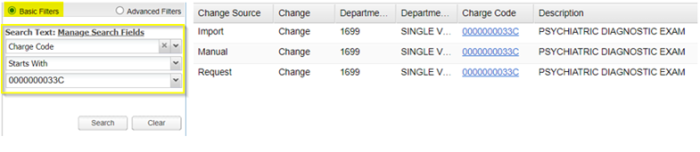
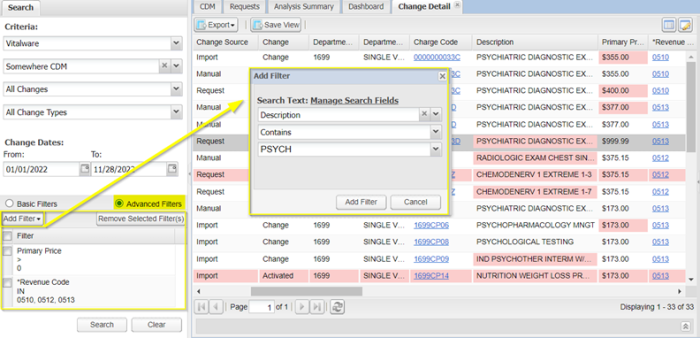
The Basic and Advanced Filters allow you to search the CDM data in the grid. The Basic Filters allow for a single search whereas the Advanced Filters allow for more than one entry of criteria to be entered.
Basic Filters:
Advanced Filters:
Viewing the History Results
Within the results grid, you can see the source and type of change as well as the specific fields impacted based on the pink shading - new adds would display as a pink row. You can hover over any of the highlighted cells and view what the original value was.
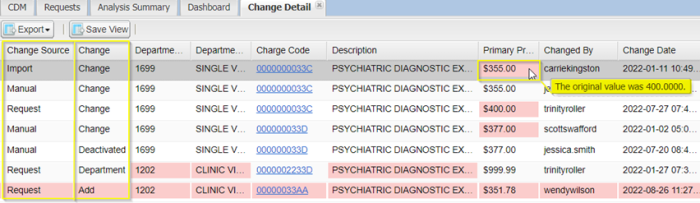
Additional fields used for auditing: Who made the changes and when (Changed By, Change Date) Requestor, Notes, etc are also available in the far right of the grid.
Customize and Save Views
When hovering over any column header a dropdown arrow will appear allowing you to sort by that field, adjust the columns that are currently displaying, or access Columns Not Loaded.
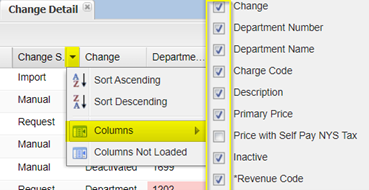

After adding or removing columns you can customize your view by dragging and dropping the columns into your preferred order and saving that view.
Note: When saving your view, it will also hold the dates in the left panel which may need to be adjusted during your next use or prior to using scheduled exports.
Exporting the History Reports
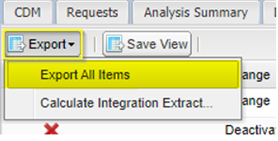
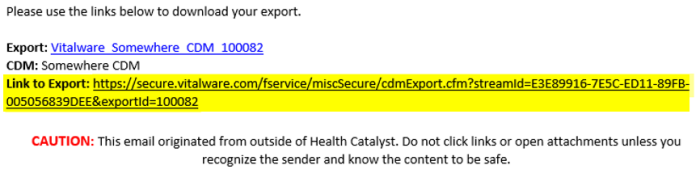
You have the option to export this report into an Excel Document. Click on Export in the upper left-hand corner of the results panel and select Export All Items. You will receive an email from vw-support@healthcatalyst.com when your export is ready for download.
If the Vitalware dashboard appears blank, there are several steps you can take to resolve the issue. In addition to the following, you may also restart your computer if you have not done so recently.
Chrome: Clearing Your Browser Cache
If you are using Chrome, clearing your cache and cookies may resolve this issue. To clear your cache and cookies in Chrome, do the following:
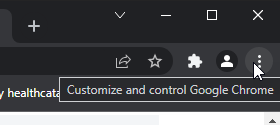
- Click the vertical ellipsis ⋮ in the top right corner of Chrome.
- Select More tools > Clear browsing data.
- Select a Time range. To delete all data, choose All time.
- Select both Cookies and other site data and Cached images and files.
- Click Clear data.
Microsoft Edge: Restore Settings to Default
If you are using Microsoft Edge, you can try restoring your settings to the defaults.
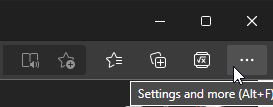
- Click the ellipsis … in the top right corner of Microsoft Edge.
- Click Settings.
- Click Reset Settings.

- Click Restore settings to their default values.
- Relaunch Edge.
Hard Refresh May Solve Several Issues
A hard refresh is a way of clearing your browser's cache and forcing it to load the newest version of a product screen (webpage).
If you still have a blank dashboard, you receive an error such as "Http failure response..." when attempting to open your product, or you don't see release updates in your product, you should do a hard reload to clear your browser cache.
Use the following command for your operating system to perform a hard reload:
- Windows (Chrome, IE, Edge, Firefox)
- Mac (Chrome, IE, Edge, Firefox)
Tip: Commands with plus signs (+) indicate you should hold down each key as you press the additional keys.
Checking VPN
If clearing your cache/cookies and performing a hard refresh do not resolve your issue, see if you are logged in to the company VPN. If you are, then log out, or try logging in to the Vitalware site on a device that is not logged in to the company VPN. If you can log in from an alternate device and the dashboard appears normal, you may need to reach out to your IT department.